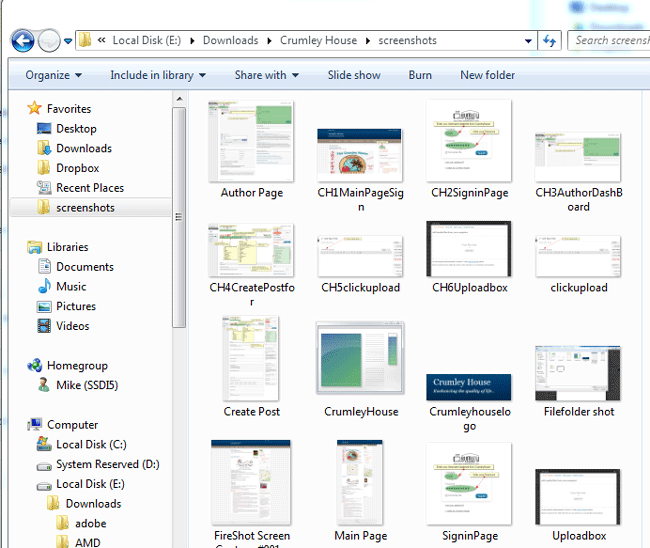
This is a post aimed at encouraging our authors to add additional content to our website by making everyone feel more comfortable with the editing page. This is a walk through of the process needed.
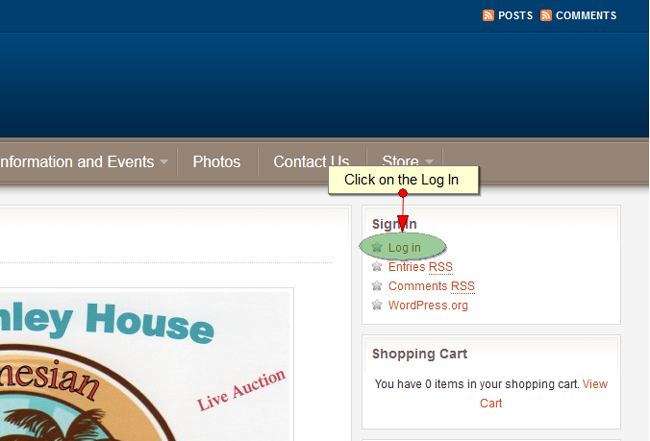
- Find the sign in, and Click on the Log In region.
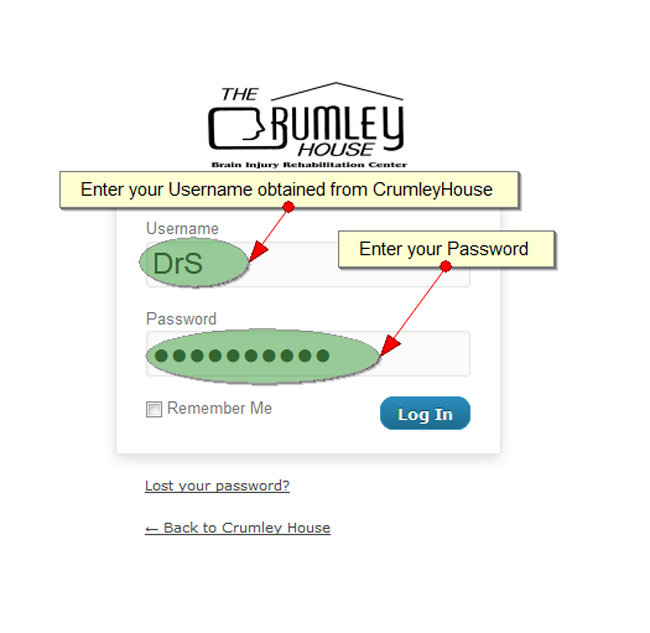
- Type in your username and password.
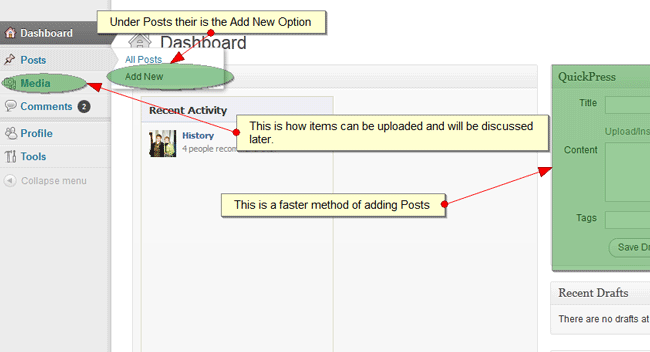
- The Next page that you are taken to is the Dashboard Page. Different levels of users have different appearing Dashboards. The Dashboard shown is the Author Dashboard. An Author can Post, Edit, and Delete their own work, but not the work of others. There is a media button for uploading media, and the QuickPress box (on the right) has Upload/insert options. This area can be ignored at present. Click on the add new post.
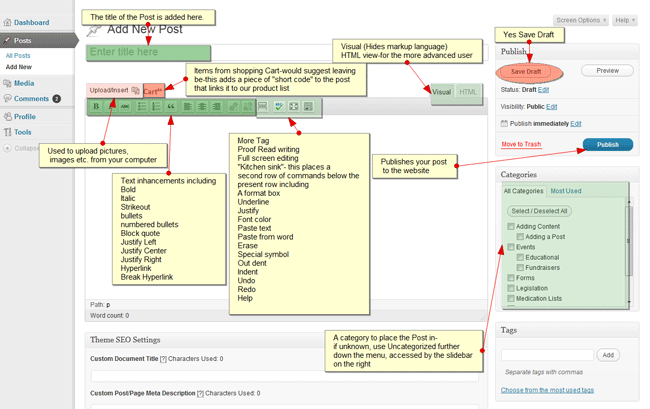
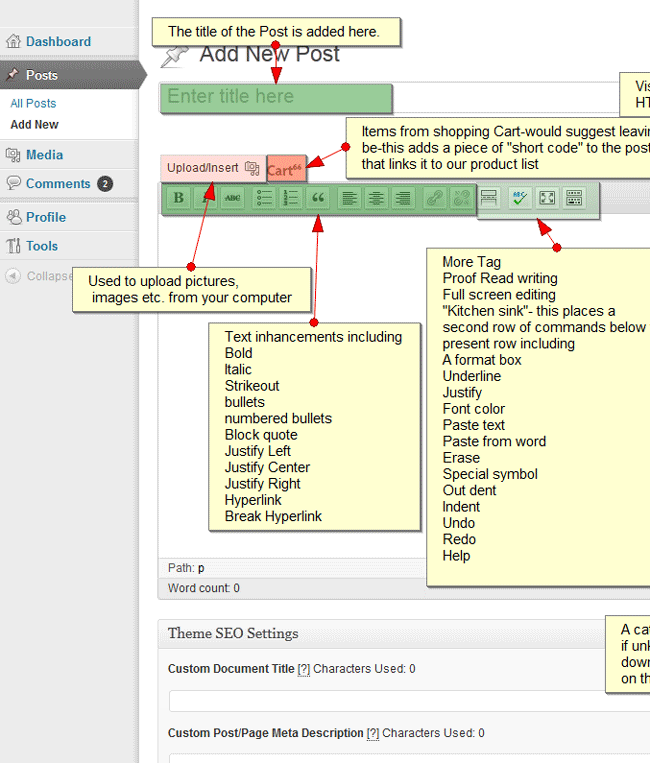
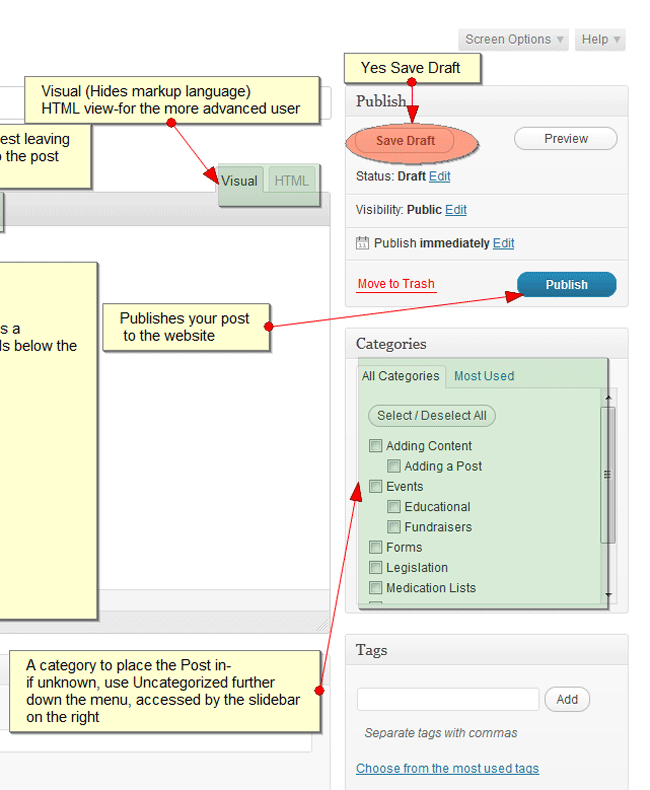
- The Author Add New Post Page should appear. This is where you should do most of your writing. Hopefully the diagrahm below is self-explanatory. Please note that you can not post directly from Microsoft Word. There is a paste from Word button that can be found under the kitchen sink that will let you post from copied Word Documents. Before investing hours on typing and/or pasting, save a Draft or two and Hit the Preview button to see what it will look like.
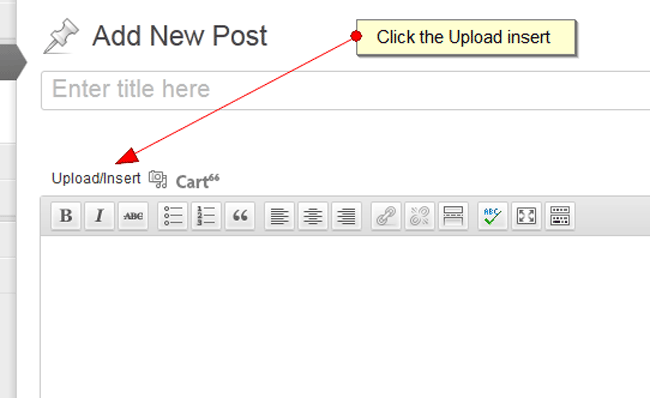
- To add pictures (or in this case screen shots) select the Upload/Insert tab (The Media button could also be used). This will allow you to add graphic items to the Post. Don’t forget to select Categories for your post (if you do it will be Uncategorized) if you forget however, it is easy to fix.
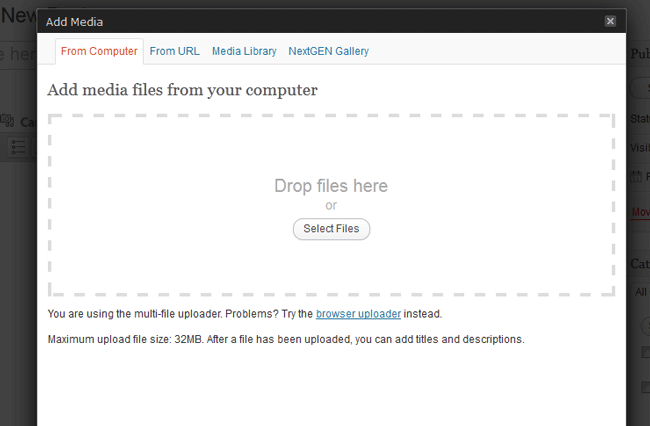
- After you click upload, the Upload box appears. I prefer to Select Files, verses Drop Files here.
- As you select files, the program will “scrunch” the files to a somewhat smaller size, and make them available in the Media library. I would suggest that you keep the size of the files to a width of 650 pixels, if you make it any larger, formating of the web site can be compromised. Resizing of the images can occur either prior to upload, or after. A cropping tool is also available.
- Good luck, and I hope that this has been helpful.
